Be Koi
Hey Guys,
I was at the Cape Town meetup on the 27th, met the community for the first time and you're all awesome people. I'd like to thank those that were there for their amazing feedback on my game. Your advice was definitely from experience not only in the coding but the entire process of community exposure and pivoting successfully.
With this, I would like to make a first installment to Be Koi - a fishy trip. I think I will split it up as follows:
chapter 0 - Intro
chapter 1 - Fish Mechanics and the zen of the swish.
chapter 2 - Making your toaster do FEM
the rest N - Hopeful heading for future updates
INTRO:
I like coding natural phenomenon stuff. My games tend to grow in scope on technical details and have a severe lack of game play value. I know this, but since I do this for fun, and I have plenty of other things to do for a healthy dose of not fun, these games are just a way of scratching itches my head develops.
During this scratching, flakes of redundant time wasted mostly falls off, but now and then something neat falls out and I'll present the neat things about Be Koi here. Feel free to do something more useful with them.

So I have to do some non fun stuff for a bit. But the first installment - zen of the swish - will come soon.
EDIT:
HERE IS THE FINAL RESULT OF THE PRINCIPLES DISCUSSED HERE:
Progress Update 3:
I was at the Cape Town meetup on the 27th, met the community for the first time and you're all awesome people. I'd like to thank those that were there for their amazing feedback on my game. Your advice was definitely from experience not only in the coding but the entire process of community exposure and pivoting successfully.
With this, I would like to make a first installment to Be Koi - a fishy trip. I think I will split it up as follows:
chapter 0 - Intro
chapter 1 - Fish Mechanics and the zen of the swish.
chapter 2 - Making your toaster do FEM
the rest N - Hopeful heading for future updates
INTRO:
I like coding natural phenomenon stuff. My games tend to grow in scope on technical details and have a severe lack of game play value. I know this, but since I do this for fun, and I have plenty of other things to do for a healthy dose of not fun, these games are just a way of scratching itches my head develops.
During this scratching, flakes of redundant time wasted mostly falls off, but now and then something neat falls out and I'll present the neat things about Be Koi here. Feel free to do something more useful with them.
So I have to do some non fun stuff for a bit. But the first installment - zen of the swish - will come soon.
EDIT:
HERE IS THE FINAL RESULT OF THE PRINCIPLES DISCUSSED HERE:
Progress Update 3:
Comments
When you push a thing away from you, you and the thing move away from each other the same distance, but by how much each of you moves is divided between the ratio of your masses. Push a light thing, it will move a lot, you move a little, push a heavy thing, you move a lot, it moves a little.
If a fish wants to move forward, it needs to push water back. If you just swish the tail in random patterns you'll move the water around in random directions, most of those just canceling each other out and your fish don't go nowhere.
You ideally want to push all the water you touch in the opposite direction you want to move (mainly backwards, sometimes not).
A simple low poly fish animation meant to just pepper some fishy atmosphere into a scene (Bomb site B in Inferno for example) probably doesn't warrant anything other than the door hinge animation. But if a fish or some other self propelling animal will get a big slice of user attention, then even someone with no knowledge of physics would still "feel" like something is off with a door hinge animation.
I made a small gif showing a door hinge fin and a few particles, and how none of them are really pushed backwards.
The next gif illustrates a better swish. More zen, more satisfying to the imagination. This one is called the slider fin. It always angles the fin so that the particles are pushed backwards. It illustrates the path of the zen swish, but not mechanically possible by a fish.
Okay, so what's the minimum mechanical structure that would permit a zen swish? Turns out we just need 3 bars. One for a fin, one for the tail, and one for the rump.
The rump serves as the heavy anchoring point, something that won't move too much and ruin our angling of the fin. The tail does the simple door hinge movements, but this is fine since all we want is a point that translates left and right for us to attach the fin to. I apologise for the awkward animations, once I understand Synfig better I'll upload some better ones, but I think they convey the message.
The 3 bone swish, the minimum amount of rigid bodies that can perform a zen swish.
Okay cool, this has all been nice toy drawings but how do you actually make a fish DO the swish. How do you implement a zen swish?
Well here we need some math. Simple math though, and I'll give the algorithm straight up and then explain how it works:
First, if we are moving a plate or a fin through a fluid on its edge, there will be very little resistance as we slice through the fluid. If we move it against the fluid on its flat side, we'll smack a lot of particles who will in turn smack us in the opposite direction. So somehow we need an equation to tell us how much we have angled our plate into the flow. Is it smacking or is it slicing, or is it some kinky superposition of both?
I present to you, the DOT PRODUCT. I'm not gonna go into detail about how it works here (click here if you want to know: https://en.wikipedia.org/wiki/Dot_product).
What the dot product gives us, is how much one vector is like another vector. If they are both unit vectors this won't cause any weird scaling business since they are of equal length, and the dot product will simply tell us how much they are facing in the same direction.
COOL! since if we said the vector pointing perpendicularly out of the surface is one vector and the plate's velocity is the other vector, we can see how much smack we're getting!
Now we just need to add some simple lift equations and we got ourselves a thrusting swisher!
Again, you can just google this but the lift equation just says the resultant thrust you get is some constants times the velocity SQUARED. I sum all the fluid property components up (just experiment, 0.001 worked for me here), and combine the coefficient of lift and surface area into one variable I can assign to each fin.
This image just shows the vectors involved
Here is my plate thrust calculation function. If anyone knows how I could syntax highlight this here, please help?
I am using LibGDX's Vector2 library here, any vector library or half decent game engine will have similar functions.
private Vector2 CalculatePlateThrust(Vector2 Vel, Vector2 Norm, float coef)
    {

        //Calculate the magnitude of our THRUST.
        //Note the MINUS since thrust occurs OPPOSITE TO MOVEMENT OF PLATE
        //Note vel.len2 gives the squared lenth of the vector (from our lift equation V^2)
        //Note coef is a mixture of values denoting how good this plate is at THRUSTING
        //Also note bodge scaling factor of 0.001 since our thrust is too amazing
        float ThrustMag = -Vel.len2()*Vel.dot(Norm)*0.001f*coef;
        //Limit our thrust if it is too magnificent
        if(ThrustMag > 0.2) ThrustMag = 0.2f;
        if(ThrustMag < -0.2) ThrustMag = -0.2f;
        //Copy the normalised surface normal and scale it with our magnitude
        Vector2 Thrust = Norm.cpy().scl(ThrustMag);

        return Thrust;
    }
Don't forget about the rump and the tail! This algorithm should be applied to the tail as well as the rump, scaling the generated force's magnitude based on the surface area smacking into the water. As a tip, make the tail's surface area small, and the rump's surface area large. We don't want the tail to really generate a force since it will just cause the fish to rotate, canceling the much needed translation of the fin that should slice through at an angle. You want to give the rump a large surface area because then it will be anchored by the force of the water, rotate less, meaning the tail will rotate more, meaning you can get much larger translation of the tail while being able to make the rump lighter, resulting in a more efficient fish.
I believe simple observation of how these tasty meat swords have evolved shows this:
If we looked at some vectors that will form when we give the FIN and RUMP high coefficient values and the TAIL a low coefficient, the universe will reward us with a swift swisher.
RIGHT. That's not chapter one done yet but I need to go for now. I will make another entry soon.
I opted for faster posts, and maybe less detail between steps, but if you guys want to ask anything about it, I will answer.
I made a WEBM clip of the 3-bone fish swish in action but can't seem to make it display on the forums here:
https://my.mixtape.moe/jdkwst.webm
I implemented the bones as physboxes in Box2D and hinged them together at the appropriate places.
One thing to do is to make the fin hinge springy but damped since a loose hinge will not angle itself only slightly to the flow, but completely flip 90 deg and only slice through the water like a piece of toilet paper waved by an eccentric small man.
For even better swishes, you can apply a small torque to the fin hinge to add a bit of a flick to the end of your swish stroke. This will also have it rotate faster to the new zen angle for the back stroke.
This just shows with some dumb swim code applied to the bone frame the principles described makes some good looking fish. I will present some simple swim code to you next.
Some dumb swim code:
So your fish needs to swish his fins left and right, there exists an optimal point in the stroke where the force vector generated by the swish points partly in the direction you want to go, and partly in a direction that will cause the fish to rotate. If you just want to swim straight, then your left and right stroke should be equal, if you want to turn, they need to be unequal.
A fish may apply forces to the tail using muscles on its sides that contract or relax, but it's analogous to applying a torque at each bone joint. Luckily Box2D or any other physics engine will provide you with easy functions to apply torques to hinges of bodies.
We can use a sinusoidal function to generate values from -1 to 1 that could be used to apply a clockwise torque, and anti-clockwise torque to our 3 bones. We can adjust the stroke length by the frequency and the stroke magnitude by the amplitude.
What if we want to turn? We can simply superimpose a value to the sinusoid making the fin spend more time swishing off-center and causing a moment that will rotate the fish:
I will finish the zen of the swish chapter here soon. But I need to go cut my hair now.
So to finish the Zen of the Swish there's not much left to discuss. The magic sits in modeling the underlying principles that cause the behavior we want. If you wanted a bouncing ball you could have animated it, giving you a once off limited use case ball, or you could model the underlying behavior of acceleration and momentum and watch the complex behavior emerge from the dynamic nature of repeatedly applied simple principles.
I could give some suggestions on AI for where to go but that becomes very application specific. For the game I'm currently making the fish have certain points they want to go to, and certain points they want to avoid.
Say you have a point you want the fish to go to, you can take a vector pointing in the direction the fish is going as well as a vector pointing from the fish to the point it needs to go to. Getting the angle between the two you and assuming you are working in degrees, you will get an answer from -180 to +180 where 0 means the fish is pointing directly at the goal. Scaling this to the required range you can directly add this as your turning offset and you should see the fish swimming towards the point.
Some fine tuning to the swimming can be done by deciding between some behaviors the fish may have. I personally used two values, Urgency and Exploration not very complex but ey, it's a fish, not a dolphin.
Exploration would see the fish randomly changing the stroke frequency and magnitude as well as the offset so the fish would seem like it's just exploring its environment. When an event happened that the fish would respond to (pellet of food dropped, or a finger in the water) it would rate the urgency of the event and then set its stroke magnitude and frequency to match. This combined with the heading difference offset to the sine wave for turning gives quite a nice little scaly swisher.
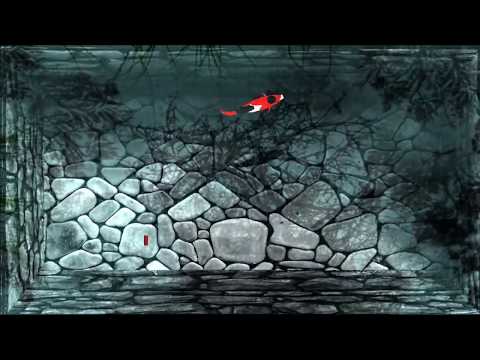
Below is a video of my fishing doing their thing (added some of the graphical components I will talk about in the next chapter):
(THIS IS NOT A MIXTAPE [you can find my youtube music list if you want] THIS IS A FISH VIDEO)
https://my.mixtape.moe/xbzxri.mp4
https://my.mixtape.moe/bgnvug.mp4
letsgo!
----------------------------------------------------------------------------------------------------
Chapter 2 - Making your toaster do FEM
----------------------------------------------------------------------------------------------------
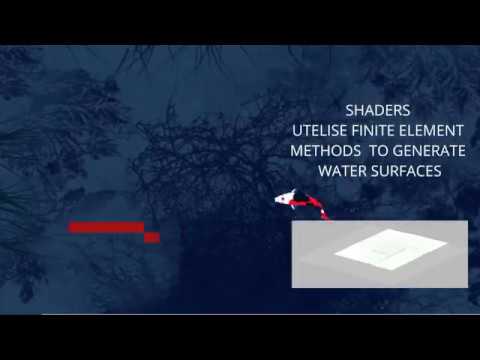
Technically this chapter will be about finite element methods on embedded graphics processing units for interactive water surfaces and other uses. The text I'm using for this section I copied from a paper I wanted to write about it, so it will be a bit more technical than the previous sections, I'll try and spice it up a bit though since technical papers are boring.
The Embedded GPU Pipeline
Embedded graphics processors need to deal with design constraints that desktop and laptop processors don’t have. Power consumption is a severe restriction followed by size and cost. Due to these and other constraints, the embedded GPU architecture trades liberties of power and space that desktop GPUs have for power efficiency and size.
GPUs take in geometric data and texture data, mashes the texture data onto the geometric data with little things called samplers and shaders and saves the resulting picture into its buffers. A buffer is block of memory dedicated to store image like data (large array of multi channeled memory units that vary from architecture to architecture). The simplest things that can be rendered with texture is a triangle, where the three vertices are the geometric data and some image being the texture data is drawn in the triangular surface between the vertices.
One of the differences in the graphics pipeline of mobile GPUs is that of Tile-Based Rendering (TBR) methods instead of Immediate-Mode Renderers (IMRs).
IMRs processes groups of geometric and texture data (called primitives) submitted to the graphics pipeline immediately and is not affected by primitives before or after it. IMRs are typical for desktop graphics since the memory bandwidth requirements are high since many times a pixel on the final image is overdrawn by new primitive that appear in-front of the previously drawn ones. Here is a pic of an IMR pipeline:
TBRs take a different approach where the frame is divided up into tiles, with only primitives seen in those tiles being rendered. This requires all geometry data to be submitted to the GPU before processing so that the location of the primitives relative to the tiles they appear in can be calculated.
TBRs allow significantly reduced memory bandwidth and therefore power-consumption. TBRs allow improved texture cache performance and reduced on-chip cache space is required since the rendering size is reduced to the tile size. This is the method used by nearly all mobile graphics processors, and doesn't present too much of an issue unless you have some funky shaders like I have for water.
Here is a pic of an TBR:
If you guys want a REALY good explanation of these two check this page out: https://developer.samsung.com/game/gpu-framebuffer
Embedded GPU frame buffers
GPUs make use of image buffers as the storage space for any data they may use during processing. The image buffers are designed for fast sampling from specialized components of the GPU called samplers. Samplers have the ability to apply different filtering methods when up sampling or down sampling from a texture.
Due to silicon size limitations as well as trying to reduce memory bandwidth, mobile and embedded GPUs typically don’t support floating point buffers, and only feature RGBA 8-bit buffers. This limits any buffer data to be stored as a 4-channel image where each channel is limited to 8 bits, you can't even tell it to use all the channels together for a larger number.
Float rendering support is mandatory in OpenGL ES 3.2 but not any OpenGL ES version below this. (Khronos, 2016) and a recent search on opengles.gpuinfo.org showed that less than 18% of devices support GLES 3.2.
The weird thing is, once you sample the pixels stored in the buffer, they will be converted to a floating point RGBA vector ranging from 0 to 1, your shader can then play with them and morph them all fancy like until it is stored and squished into 8 bits again. This may be fine for human consumption since you won't be able to tell the difference between 254 and 255 red, but for some mathematical operations such as FEM water it makes stuff act weird.
Finite Element Methods for water
Finite Element Methods or FEM is a numerical way of solving many mathematical problems in physics and engineering that may involve partial differential equations (fancy word for things that change over time because other things change over time). Examples of FEM is in the calculation of stresses and strains in material analysis, heat flow, magnetic and electrical fields or vibrational analysis is readily available. Honestly the easiest way of explaining what it is, is when you imagine one particle is attached to another particle with a spring, you pull the one particle and the other particle will move slugishly, do this for a couple of thousand particles and hey presto you've got a finite amount of elements acting like a squishy object (hence Finite Element Analysis).
FEM divides the object or space of interest into a lattice of elements (typically polygons) where the physical properties of each element represents the physical properties of any material within that element. The interaction of one element with its neighbors to change its current properties is governed by the equations of the analysis being carried out.
Along gameplay and story line, the believability of the game world is a major part of what makes a game immersive and fun. Good physics and consistent world dynamics are one part of a game’s believability and another is good graphics. Liquid surfaces pose a challenge to reproduce realistically since their structure is produced in reality by the interaction of an effectively infinite amount of particles. Water surfaces can be treated with continuum mechanics and therefore Finite Element Methods can be used to approximate them.
A mesh of nodes is set up so that each node represents a volume of water on the surface, its height, and its velocity. Surface tension between nodes is simulated by each node looking at the height of its neighbours and then moving towards their average relative to the node’s own height. Momentum and damping is simulated by moving the node by some fraction of its previous velocity.
This produces a mesh of nodes that will propagate waves from a disturbance and behave very similar to a fluid surface even if particle surface translation is ignored
Just for those that have never used this technique before, the end goal here is to use the graphics card's buffers to store the node data, and shaders to calculate how they effects each other.
Finite element methods have certain computational requirements to ensure their stability and effectiveness. When elements interact with one-another and calculations don’t behave mathematically precise enough (due to rounding or other computational limitations on computers) this could cause undefined behaviour or rapidly decaying accuracy.
Two major issues were encountered while implementing the FEM water shader on mobile devices from buffer storage to rendering pipeline structure. These were:
1. Maximum element value resolution and byte buffer limits
Mobile graphics processors do not generally feature floating point buffers, only X have featured these and it does not seem like a priority for manufacturers to add floating point buffer capabilities in sacrifice for cost and size. Mobile GPUs have RGBA 8 bit buffers without the ability to use the 4 channels together.
1.1 Dealing with 4 Channel byte buffer limits
In order to obtain higher resolution between elements and minimising step input disturbances from rounding errors when floating point values are compressed to bytes in the RGBA buffer, the height of the node should be stored in both the R and G channels providing 65535 units of resolution while the velocity of the node should be stored in the B and A channels. Since there is no way of using the channels in combination, the shading program needs to break the floating point value of height and velocity up into two pairs of vectors, and it needs to recombine them to floating point value on sampling.
2 Neighbour element sampling and tile edges
Due to the reasons mentioned in section X mobile GPUs do not process fragments directly, but by grouping them together into tiles to reduce memory bandwidth. This has the effect of rendering memory access between tiles when sampling fragments either undefined or very costly. The tiles are written back to the buffer when their rendering is completed.
2.1 Dealing with Tile Based Rendering methods
When sampling a frame buffer for a pixel’s neighbouring pixels in order to perform the finite difference equations, some of the neighbours may fall outside a tile’s area which means a neighbouring tile needs to be sampled. Depending on the processor, this either means very long delays to wait for the current buffer to be flushed, or sampling an undefined value as the neighbouring tiles are locked. When this happens random noise in the buffer will appear along the tile edges as can be seen in the images below. This is because a sudden discontinuity is created along these edges, pulling the node being processed to an incorrect height.
The image below shows a sample of the centre row of pixels in the height buffer with the length of the green spike showing the height value of the buffer’s pixel at the X coordinate. At the centre of the spikes are the edges of tiles.
A top down view of the height map during this phenomenon is shown in the next image where unstable oscillations can be seen appearing along the tiles. Some tile lines are marked in blue.
The solution is to use a swap buffer for the height maps. The Image below shows how buffer B is having tiles filled with information sampled from buffer A allowing buffer B to be flushed back to memory after all tiles are complete.
Optimising your FEM for your toaster
While finite element methods provide a realistic method of solving continuum mechanical problems, the accuracy of the solution is always weighed against the processing requirements. For engineering applications real time solutions may not be necessary and very refined meshes with detailed interactions are preferred for accurate results. In the case of mobile games or other interactive uses, the performance and speed takes priority.
The time it takes to process a mesh is proportional to the amount of elements in the mesh and the amount of calculations needed for each mesh element. Reducing mesh size is the first performance optimization that will be discussed thereafter node processing requirements.
Mesh size optimization
Since each node in the FEM model is stored as a pixel in a GPU buffer, creating a smaller buffer will reduce the amount of nodes and therefore calculations.
Reducing mesh size while keeping mechanical behavior
Just changing the size of the buffer will only change the number of nodes, which means to represent the same surface area of water, the nodes will in theory be further apart. This means each node now represents more volume of the continuum it represents (in this case more water) and therefore to keep the same mechanical behavior the nodes need increased inertia.
The inertia value is something you can play around with to look good, higher inertia makes slower waves, less fine ripples, and will look like a larger area of water or a denser fluid. Optimise the inertia and springiness so it looks good for the body of water you need. Just note that this method will not work very well for oceans or large water bodies where surface tension has a very localised affect. The smaller the body of water, the more realistic it will look.
When you scale your mesh back up to the image size of your body of water, use linear scaling as the image below should explain:
Node calculations optimisation
Ideally all neighbouring pixels should be sampled by an exponentially decreasing value based on their distance from the node being updated. Two sampling methods were tested and will be shown here. If the device the shading program needs to run on has the processing capabilities and accuracy is required, the first method can be used, but if efficiency is more important, then method two can be used. Note for water surfaces in games, the user will not be able to tell a difference in quality between the two.
Method 1: Inverse radiated vector method
This method makes use of a GPU’s ability to do vector calculations very efficiently, providing a means of computing the weight for each
I want to post updates on the game from this point on, but if people are interested I will expand these sections with pleasure.
Here is a screenshot where half the screen is rendering the water, and the other half the normals buffer, running at 30fps on a 4 year old Sony Experia.
I will release a youtube video hopefully in the near future with a lot of this stuff animated and showing the results. Right now I want to change my 3 bar fish to mesh fish deformed by a spline so that the fish curves look super silky smooooth.
I've been looking at some koi, and other fish swim, and there's some serious maneuvering and speed going on with those slippery meat swords. I want to capture that in the game.
First I need to rethink my mechanical behavior of the fish since sometimes Box2D has a bit of a fit and my fish end up spazzing like a badly welded Garry's Mod contraption for a second or two. Can't have that, the speeds and turns I saw in real fish would induce that too much.
Secondly the amount they bend their bodies and fins are much more than is possible with the 3BAR swish while still keeping the fish visually appealing.
Here is what I'm thinking:
I have a base polygon mesh which means I can now just UV map my auto-generated koi skin to that. I just need to deform the mesh with the sim stroke, not using bones. It shouldn't be impossible, I'll show a picture below with three images. The first is just the base fish, the second is the fish in stroke. You'll see the body follows a sinusoidal curve that's been cut off ideally as the point of highest incline, but that the sinusoid also disappears closer to the head. Method one is to add an offset equal to the amplitude, and method two is called the pinch, where you multiply a math function by something over the distance to the origin causing it to be squished out of existence at the start.
I'll keep posting on the progress here
Tangent circles method and the splines method. I think I'm going to go with the splines method since all I need to do is move to points of the spline up and down whereas the circle method requires changing radii and centers, and dealing with circles of infinite radius.
Now the more challenging aspect of forming this mesh to the spline is at hand. It turns out after some research that there is no closed solution to the problem of dividing a function curve into equi-distant chords which is what I'd need if I want to fit polygons to this mesh. Here's a link to why:
https://math.stackexchange.com/questions/2293191/dividing-a-curve-into-chords-of-equal-length/2295582#2295582
I'm going to try approximating the curve by creating tangent vectors to the derivative of the curve, hopefully it won't be too hard. I also need to lock the spline's length otherwise the fish will grow and shrink as the points are moved.
When you have a physics engine like BOX2D, it does some cool shit in the background to stop your physics from freaking out. The reason your physics freaks out is because you can't process what's happening down to the smallest zepto-plankian second and ensure you don't skip some important stuff, you can only calculate it in millisecond chunks. This means if something should have stopped between millisecond X and millisecond Y, it will overshoot and you need to overcompensate for that when you realize this has happened.
One of those things physics engines do is to use Runge-kutta integration for the physics. This just means you get a better guess of what took place in that dark time between processing steps. This still doesn't eliminate problems, but greatly reduces them.
The problem:
When small discrete physics events like a collision happens, everything's cool since a small error in calculations has no visible effect. When you rely on that engine to simulate something in say, water, there is a this BOMBARDMENT of physics request (push left, no now push right, omg APPLY FORCE STOP NO DONT STOP) as your equations try and simulate the force of water on your components. Most of the time when no evasive manouvres take place this is all resolved and the user never see the discrete-differential-equation chaos behind the scenes, but like I mentioned in the previous section. Once in a while it just F_cks up completely and you're left with a wildly flailing fish waiting for you to press the home button and emancipate it.
This limits the use of strong forces on the fish, and unfortunately for water this leaves a lot to be desired. Stuff under water deal with A LOT of force. In the air it's still chilled, forces not so much, you can mush through air, you can't mush through water. And since I want a challenging fast fishy swoosh swim game, this won't work.
The solution
Abandon the physics engine to do my swish force fin calculations and do this all pure mathy closed system like.
I think I've typed too much, but here's a diagram of what I want to start doing, as well as a twitter handle for video updates:
So follow @BeKoi7 on twitter, there's some cool shiz there now and again.
https://twitter.com/BeKoi7/status/1115240385461272577
It took a lot of tweeking the physics, low pass filters EVERYWHERE, low pass filter on user input, low pass filter on fluid output all so I can really up the fluid density to one ton per cubic meter levels (das water). IT SWIMS, also it's kind of an art to learn to swim like that controlling the contraction of the muscles only by X,Y of the mouse. It's fun though so that's a good sign.
I Present to you my milkshake, boys welcome:
https://twitter.com/BeKoi7/status/1115760979017719808
I will post a more normal view of the actual game soon. Gotta make coffee first
I really want to put this on a website so you can try swimming, it's QWOP fun.
I'd gladly explain it all here if you want me to:
-The flat shader you're using on the fish clashes quite strongly with the real/photo backgrounds and the realistic water. Are you planning on going for more cartoony backgrounds (could be some fun to be had there), or a more realistic look on the fish?
-The lack of movement on the pectoral fins is also quite jarring. While they're not used to generate thrust, watching real fish you will see slight corrective movements corresponding to the main caudal fin movements. Those could probably be cheated with IK or something.
-Similarly, I'm really missing any dorsal fin movement, that could probably be addressed the same way?
-Now that you've spent some time working on the simulation, do you have any ideas yet about what the larger game/app will be?
Hey Matt, thanks for the reply!
You point out very valid things which I have put off doing, but they need to be handled at some point:
The shader that draws the fish is still the default shader since I wanted to see if my painting algorithm worked but even if the painting algorithm just adds some shading to the edges of the fish it will look a LOT better.
The whole fish is procedurally meshed and connected to the skeleton, and the pectoral fins were a quick few vertices added afterwards . There is definitely something I can do with them such as sweeping back when speed increases, or flapping when turning at low speed, but these will mainly be animation based which is a bit of work when the whole mesh is determined by the skeleton. But it will be done! Can't leave those spoon like appendages sticking there I agree.
There is currently no dorsal fin, and is another part of the mesh I will have to program in.
I've been getting mixed reviews from some people loving the ability to swim themselves (same people who liked QWOP or Daddy Longlegs) and others that liked a previous version of the game where they could feed their koi and watch them eat and swim like pets (like a tamagochi things).
As for the larger app idea, I'd love to host this on my website using GWT and let people swim around for for now. I still need to learn how the GWT tools work, but this is LibGDX so maybe it wont be that hard.
If I have time and decide to go for a more pet-like route, maybe they can just log into the website now and again to feed their koi. They could leave it on in the background (cast it to a TV screen or something like that) and people can trade koi they've grown on the website ? I love that idea.
If you have anything you'd like to see in the game, let me know and I'll work that into the non-existent grand plan.
https://en.wikipedia.org/wiki/Pocket_Frogs